In this article, the way we connect 3CX to Cisco PBX is IP TO IP. The 3CX extension is assumed to be 6XXX, and the Cisco extension is 5XXX. (Note: Because the DID of the 3CX SIP line requires a minimum of four digits, the 3CX extension is preferably four or five digits. If it is 3 digits, the prefix is added to the Cisco when Cisco call 3CX extension).
Steps
First, let’s set on a Cisco PBX.
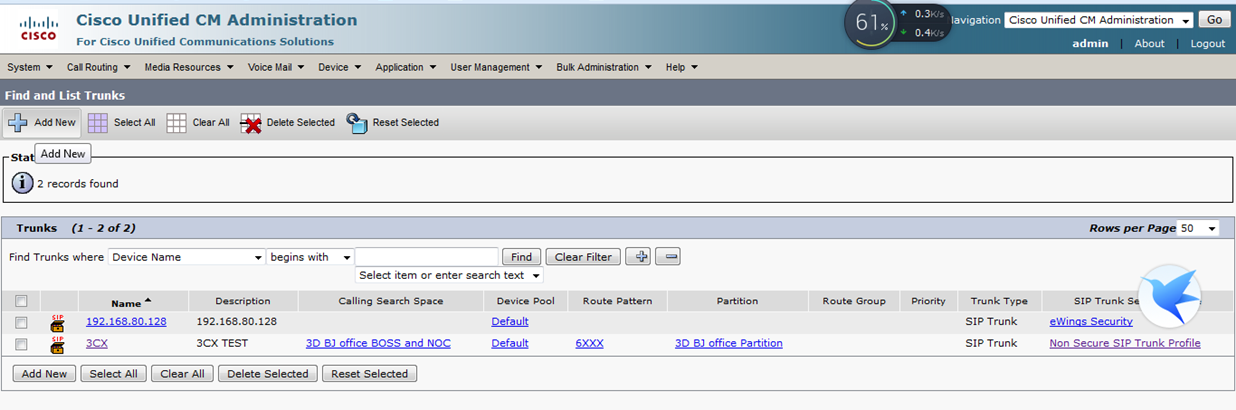
- Create a new SIP Trunk. Click on “Add New”
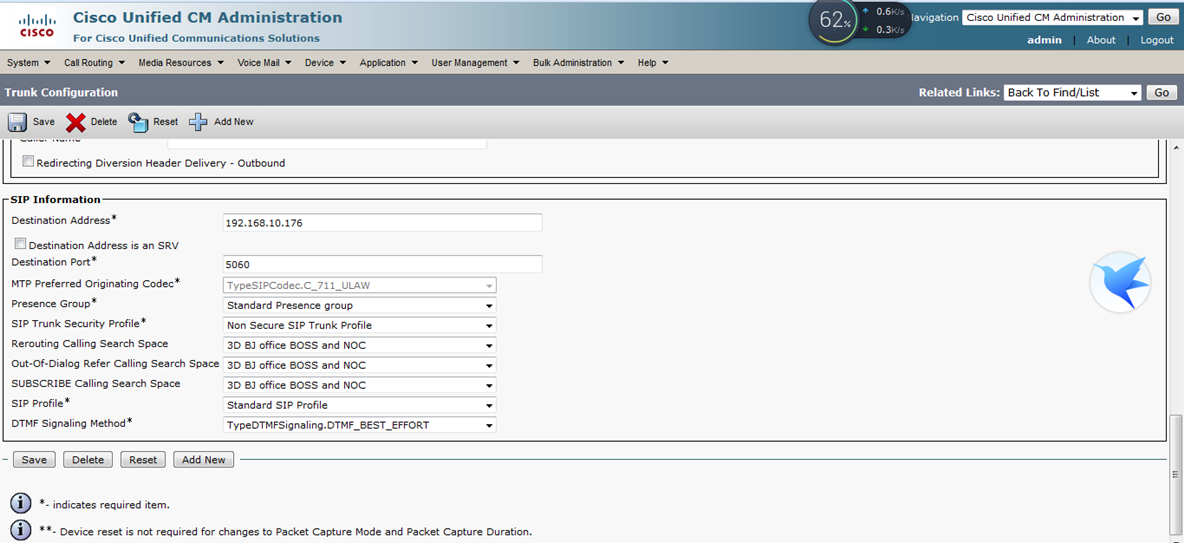
- Enter the IP address and port of the 3CX server.
- The next step is to set the routing parameters and send the 6XXX number to the 3CX PBX.

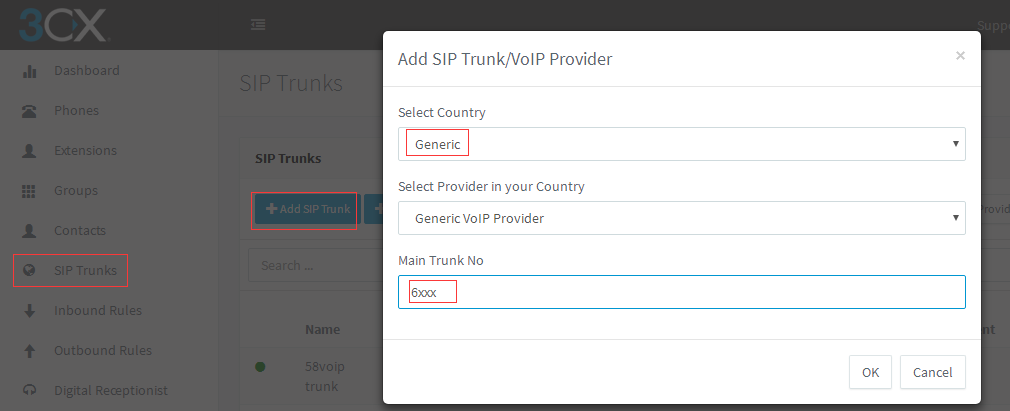
- Here we have completed the settings on Cisco. Next we go to the 3CX control panel for setup.Create a new SIP trunk on the 3CX SIP trunk bar, select Generic, and write the DID number to an extension in 3CX.
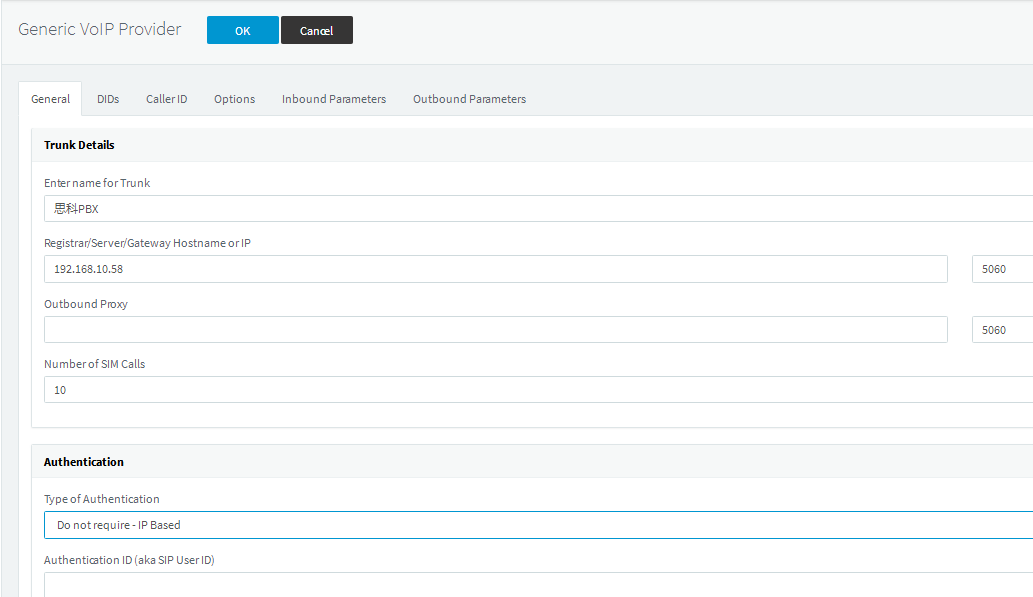
- Enter the name of the trunk line, the IP address and sip port of the Cisco PBX. Select the authentication method as IP Based and click OK above. Here the line is established.
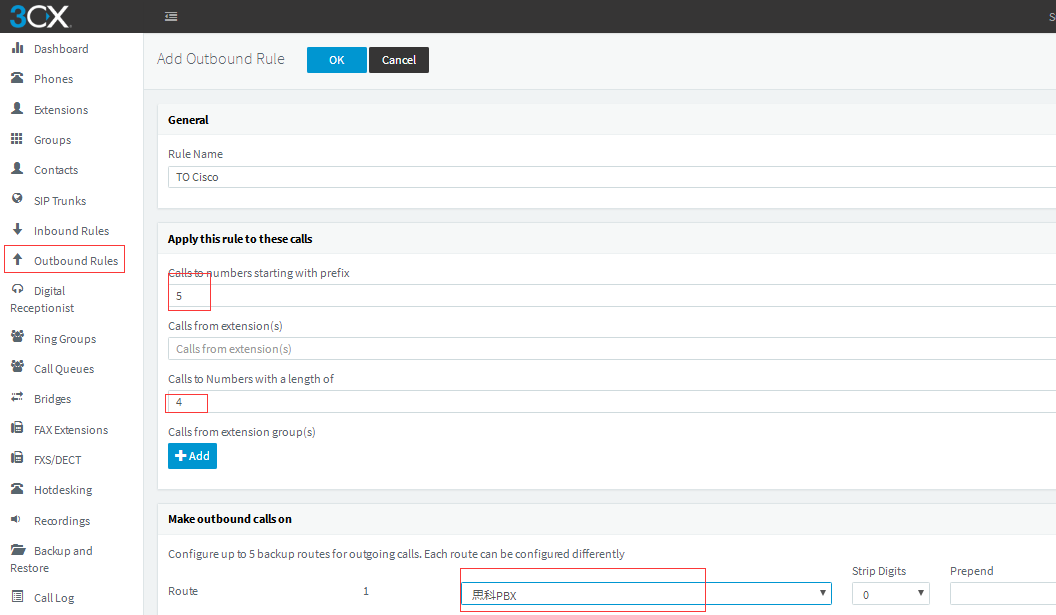
- Next, set the Outbound Rules, go to the 3CX Outbound Rules, create a new Outbound Rules with a prefix of 5 and a length of 4, and select the Cisco line. At this point, the 3CX extension can be dialed to the extension under Cisco PBX. If you want to use Cisco’s outside line, create an Outbound Rules with the same rule as Cisco’s Outbound Rules.
- Finally, set the Inbound Rules, create a new DID rule on the 3CX Inbound Rules bar, the selected number is the DID number just created, such as 6XXX, and then assigned to the 6XXX extension. After the establishment is completed, the rule can be exported, and then according to this rule. Create DID rules in batches so that incoming numbers can match the corresponding extensions correctly.