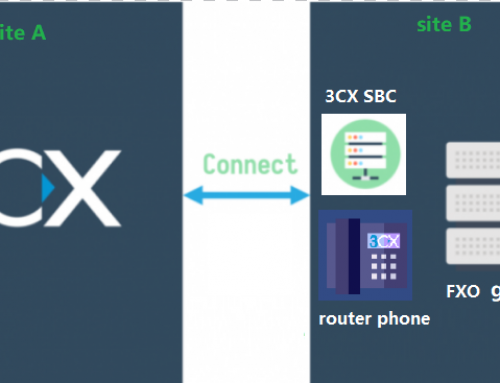
Background:
For 3CX-authenticated SIP trunks, besides entering some basic account information, there is generally no need for additional settings changes because 3CX has already conducted comprehensive testing with it. However, for SIP trunks not authenticated by 3CX, if the service provider has specific requirements for the Invite requests being sent, the 3CX server may need to send out the specific fields. We can directly modify the outbound parameters of the SIP trunk in the 3CX V18 web interface to meet the requirements of the service provider. However, after the release of 3CX V20, many outbound parameters cannot be directly modified on the web interface. To modify certain parameters, besides customizing the SIP trunk template, you can also refer to the following method to achieve it in the admin page:
Steps:
1.Based on the account information provided by the SIP trunk service provider, create a new SIP trunk. The following example is based on an IP to IP connection: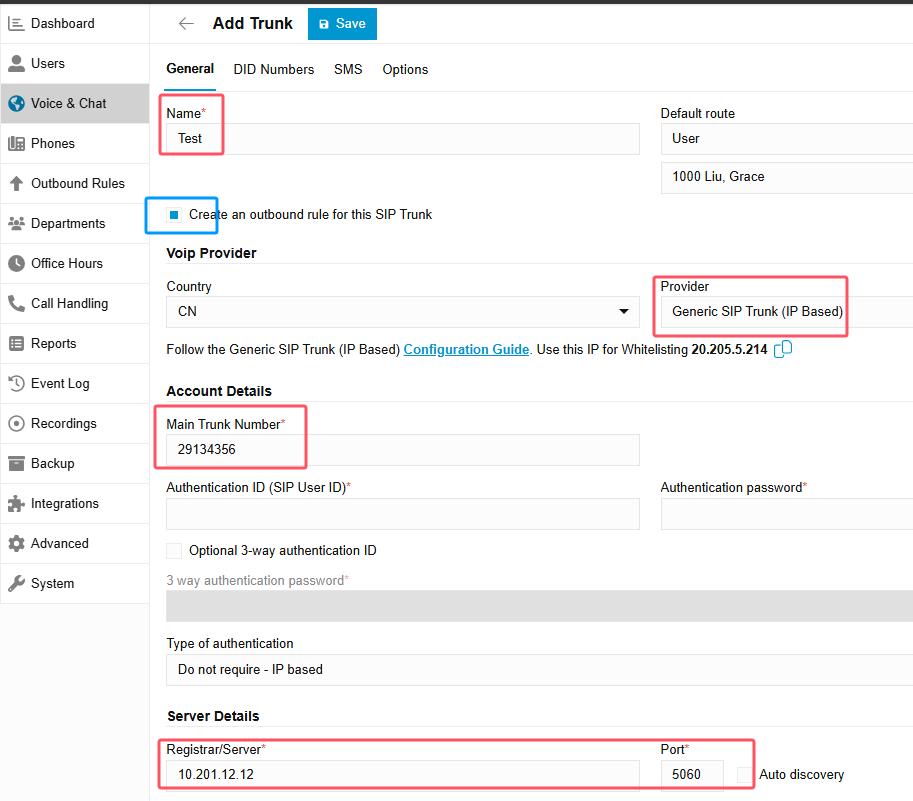
Temporarily no need to set outbound rules, and it’s better to disable this option(Create an outbound rule for this SIP trunk) and then click save.
2.Click the three dots next to the row where the SIP trunk is displayed, and then click to export and download the sample file of this SIP trunk to your local device:

3.Open the sample file with a text editor and edit it. For example, if we need to send PAI: 29124356@10.201.12.12:5060 to the service provider, you can add these two lines:
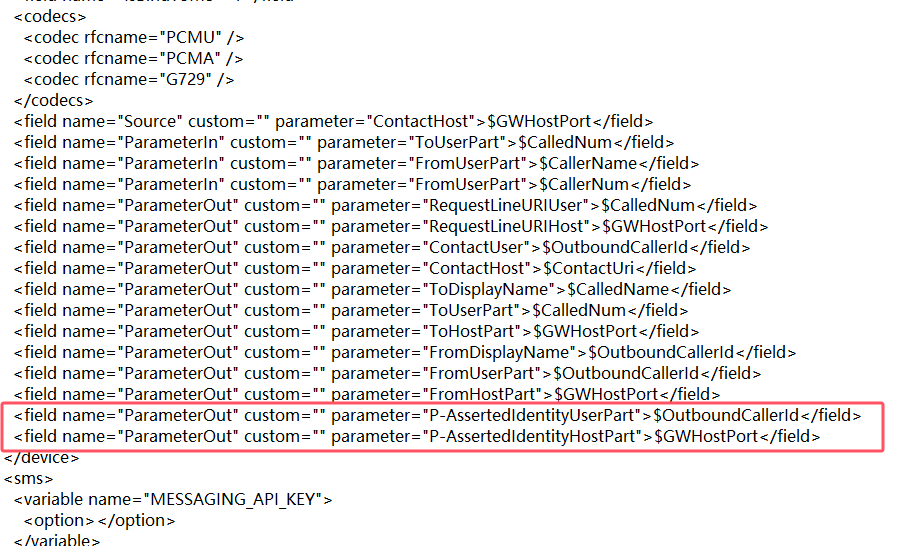
After making the modifications, click save.
If you are unsure about parameter configurations, you can refer to the following ways to set it:
Method 1: Refer to the settings of other authenticated SIP trunks. Other authenticated SIP trunks may contain relevant outbound parameters, for example:
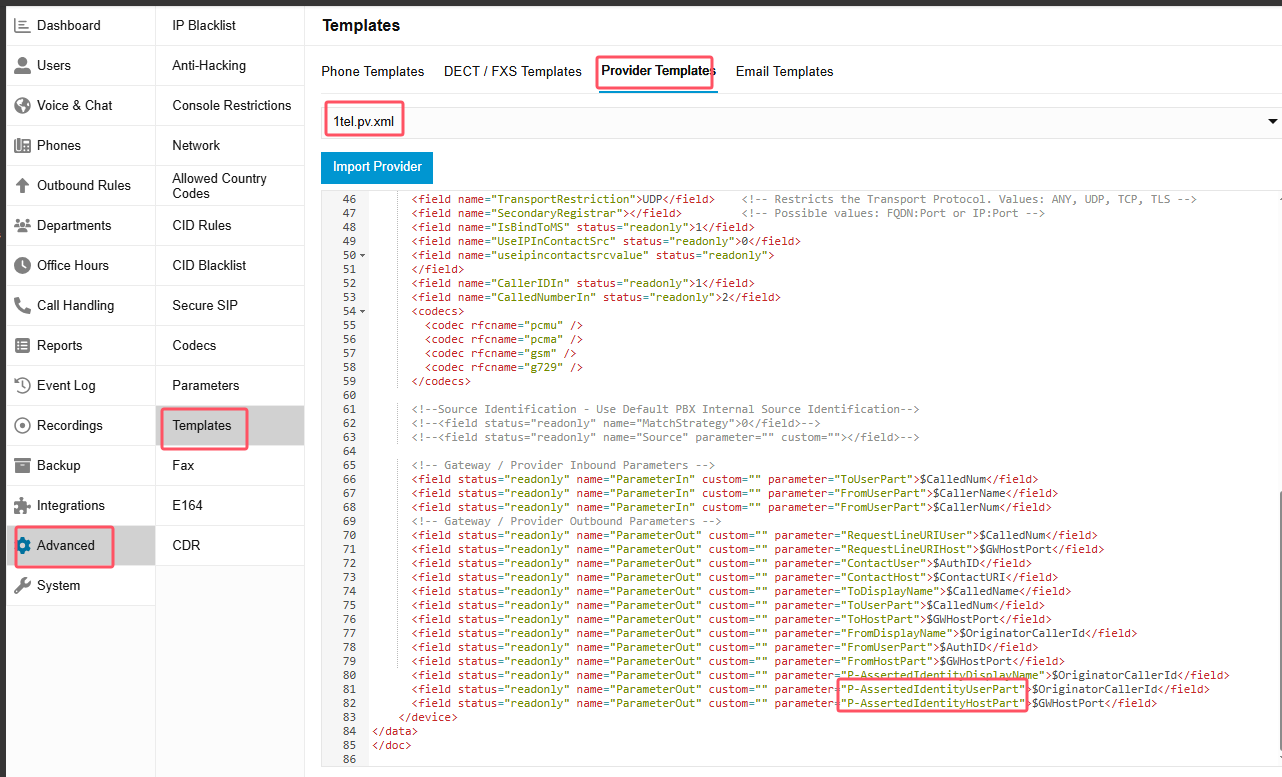
The setting of parameter values can be referenced from the official 3CX link:
https://www.3cx.com/blog/docs/voip-provider-template/
Method 2: If you have a V18 server, you can first make the necessary modifications to the outbound parameters in the V18 SIP trunk and then export the template to check.
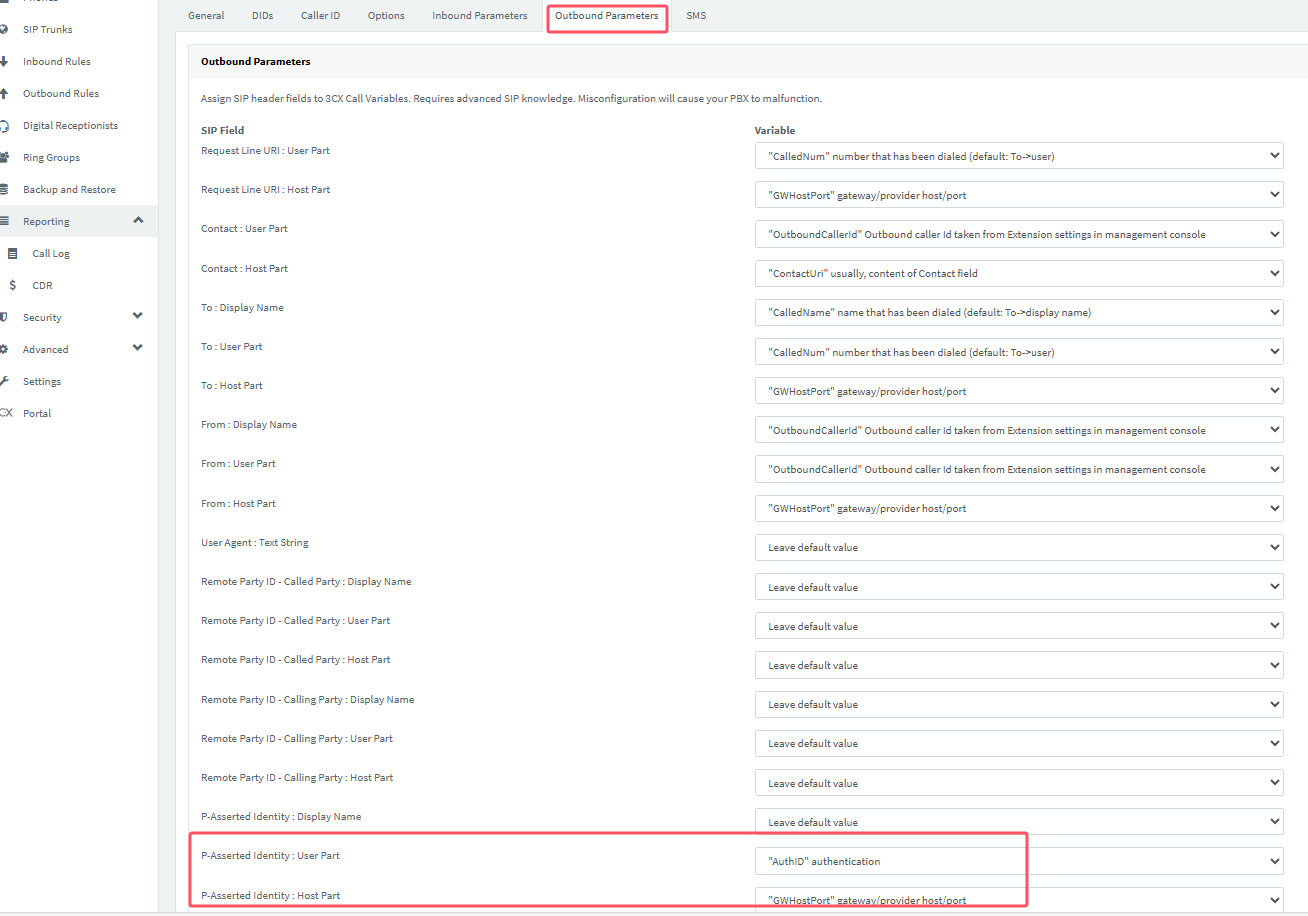

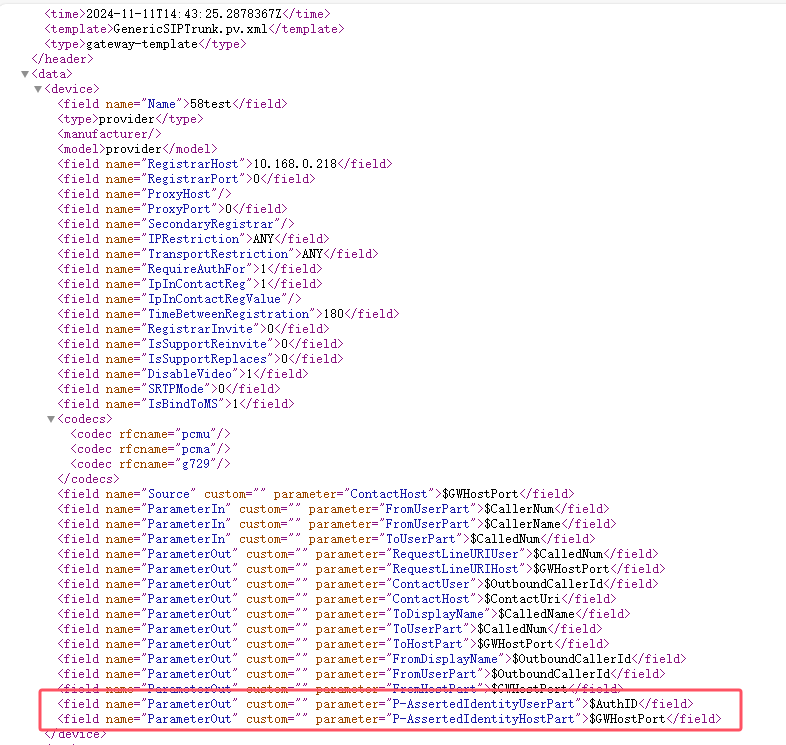
4.Import the modified sample file into the 3CX server:

Modify the configuration of the new SIP trunk as needed, confirm, and then click save.
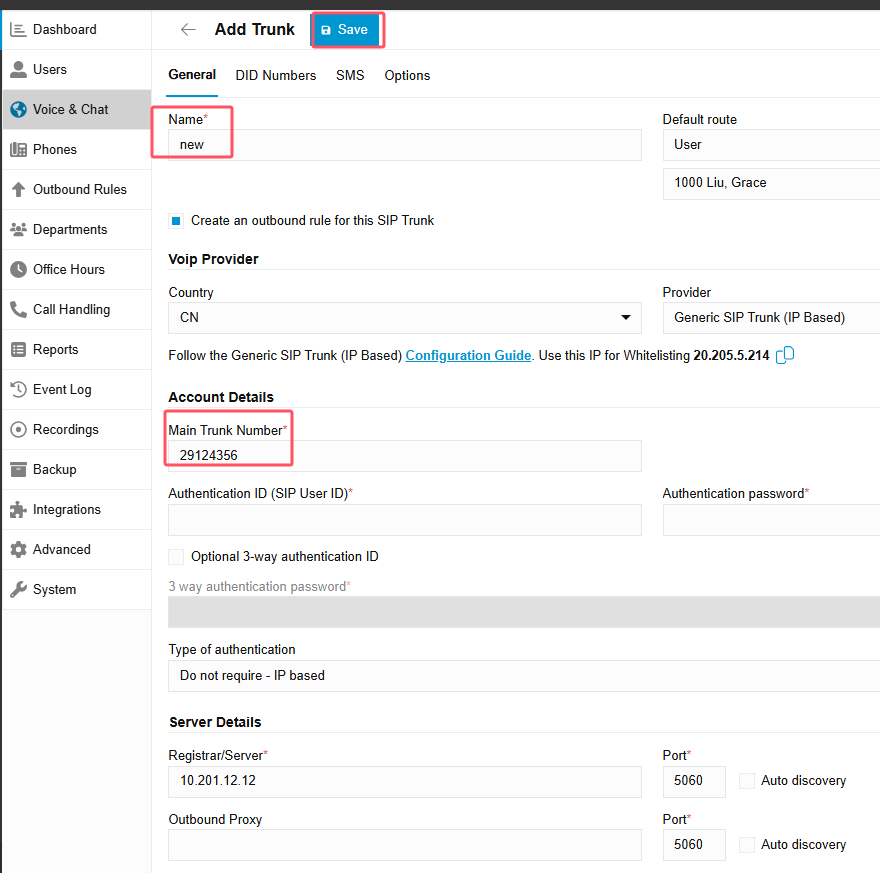
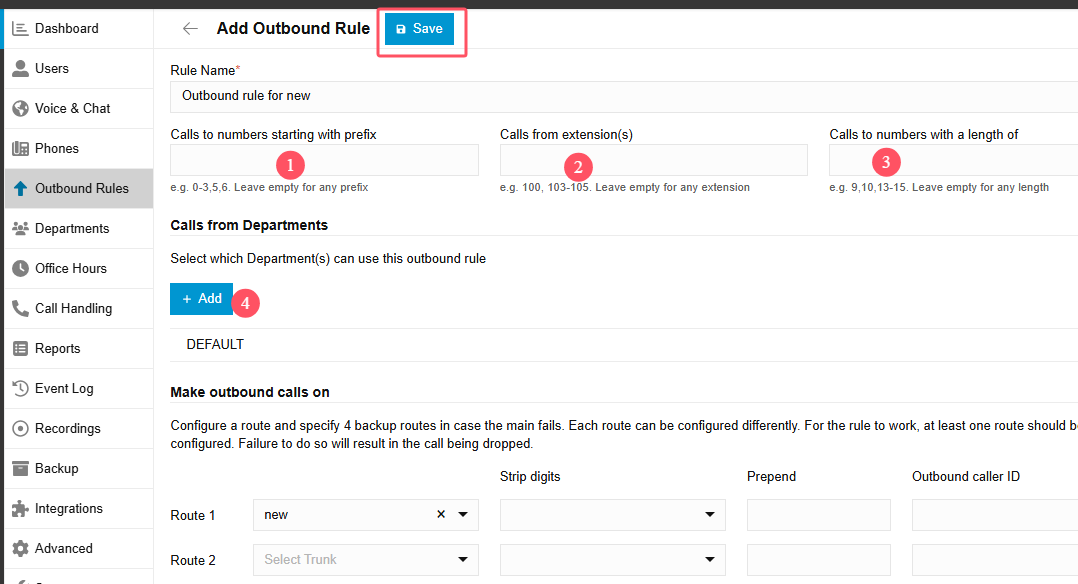
Next, set the outbound rules. At least one of the four parameters in the screenshot must be set, or else the outbound rule will be invalid. In this example, we select the department using this SIP trunk and then click save.
5.Return to the SIP trunk page. Click the three dots to the right of the row where the old SIP trunk is displayed, and then click to delete the trunk:

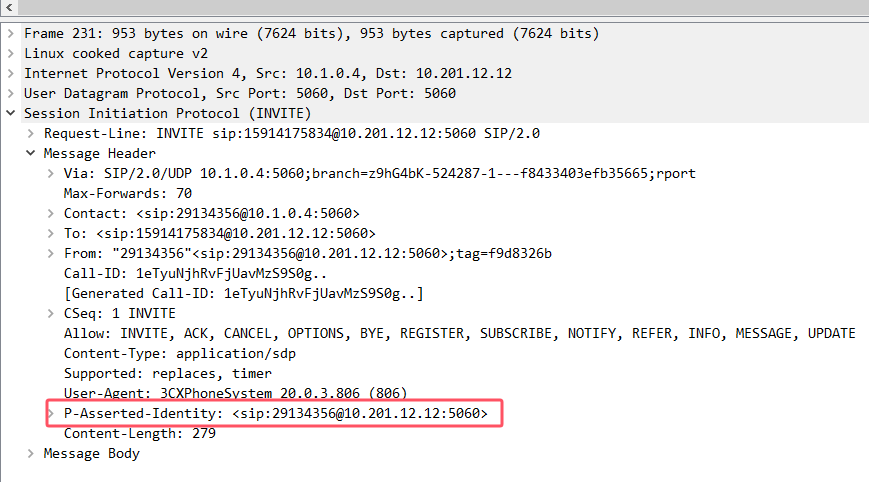
6.Test and verify the results. When making the outbound calls via the SIP trunk, by capturing packets on the 3CX server, you can see that the settings have taken effect:
