Some of our customers’ SIP Trunk operators have restrictions on the User Agent name. At this time, we need to customize the User Agent name. In this article, we will introduce how to change the User Agent name of the 3CX SIP Trunk.
3CX V18 Version
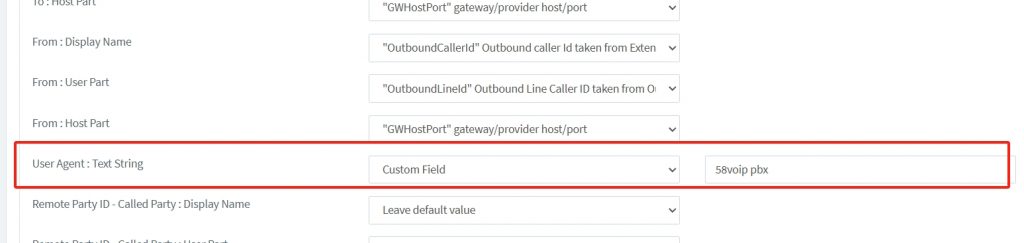
If you are currently using 3CX V18, then the operation is relatively simple. We open the 3CX management console-SIP trunk page and edit the SIP Trunk for which we need to customize the User Agent, go to the outbound parameter page, and then find User Agent: Text String, select the parameter as custom field, and then fill in the custom name.
3CX V20 Version
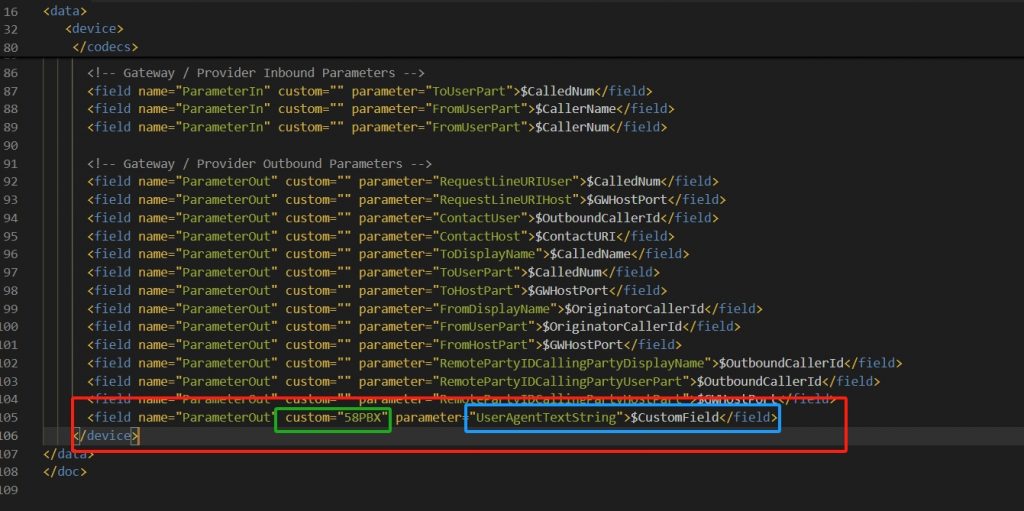
3CX V20 version has simplified many options for outgoing call parameters, so we can’t modify the User Agent parameters directly in the management console. We need to add the User Agent parameters in the template file of the SIP Trunk.
In order not to affect the normal display of other SIP Trunks, it is best to create a custom Trunk template. The template parameters can copy the GenericVoIPProvider.pv.xml template, and then modify the relevant names and parameters of the template. If you want to implement custom User Agent parameters, we need to add the following parameters in the template
<field name=”ParameterOut” custom=”58PBX” parameter=”UserAgentTextString”>$CustomField</field>
Among them, 58PBX is the custom User Agent parameter.
We ssh to the 3CX server and upload the template file to the /var/lib/3cxpbx/Instance1/Data/Http/Templates/provider/ directory. We can select our custom template when creating a new SIP trunk. When testing the call, we can find that the User Agent name has become our custom name.