The configuration of the phone in the 3CX V18 version is relatively simple. With the release of the V20 version, 3CX has upgraded the phone configuration, making the phone configuration simpler and faster. Today we will introduce how to quickly configure Fanvi phone.
Router phone configuration
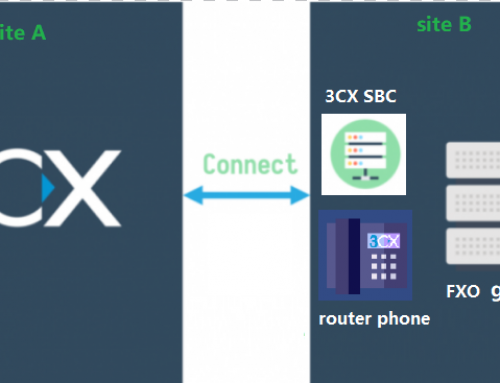
3CX launched the router phone function in the V18 version. The router phone integrates 3CX’s SBC into the phone, thereby saving hardware for deploying SBC. Fanvil provides router phones, which can be used as router phones or ordinary phones. Below we will introduce how to configure Fanvil router phone.
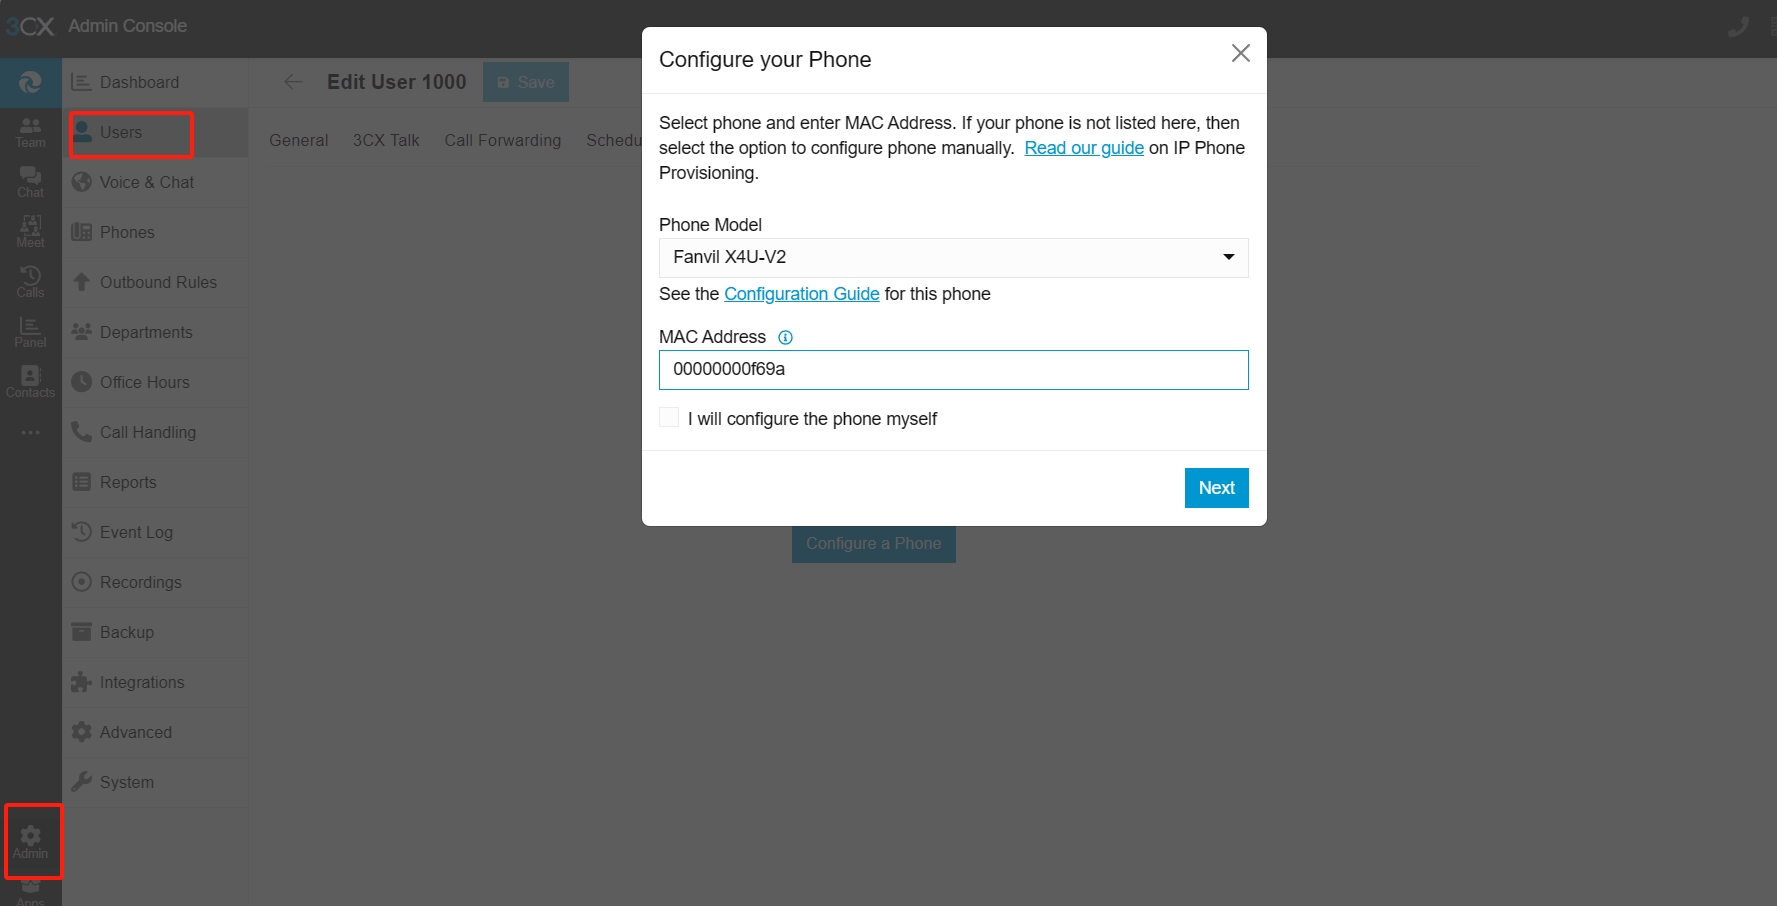
First we need to go to the admin console, which requires users with relevant roles to access. Ordinary users do not have this option. We go to the user page and edit the user to whom we want to add the phone. Click the IP Phone page, then click Configure Phone, select the model of our router phone in the pop-up window, then enter the phone’s Mac address and click Next.
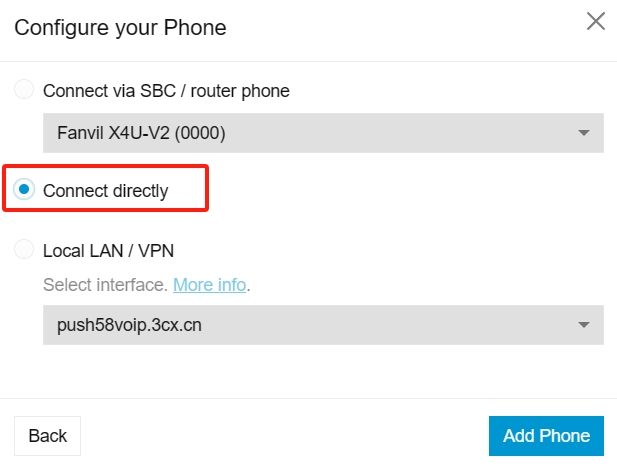
Next select Connect Directly and click Add Phone. At this time, we only need to plug in the router phone and wait for the phone to complete automatic configuration.
Normal phone configuration
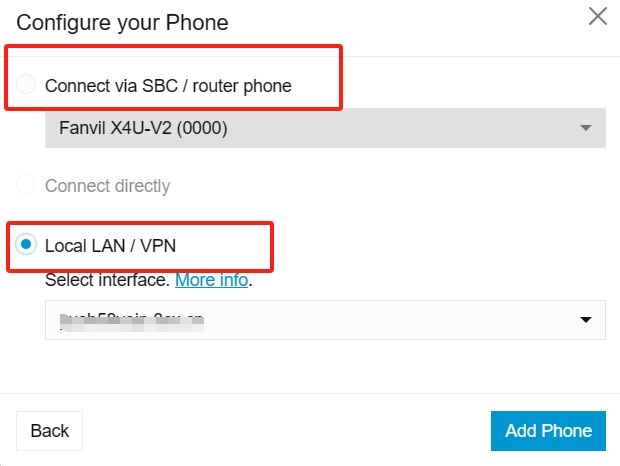
There are two ways to configure an normal Fanvil phone. The first way is similar to a router phone. After entering the Mac address, select the appropriate option according to the network where the phone is located. If the phone and the server are not on the same network, we will choose the first option. if we are on the same network, we can select the third option, then click Add Phone, plug in the phone and wait for the phone to complete the configuration.
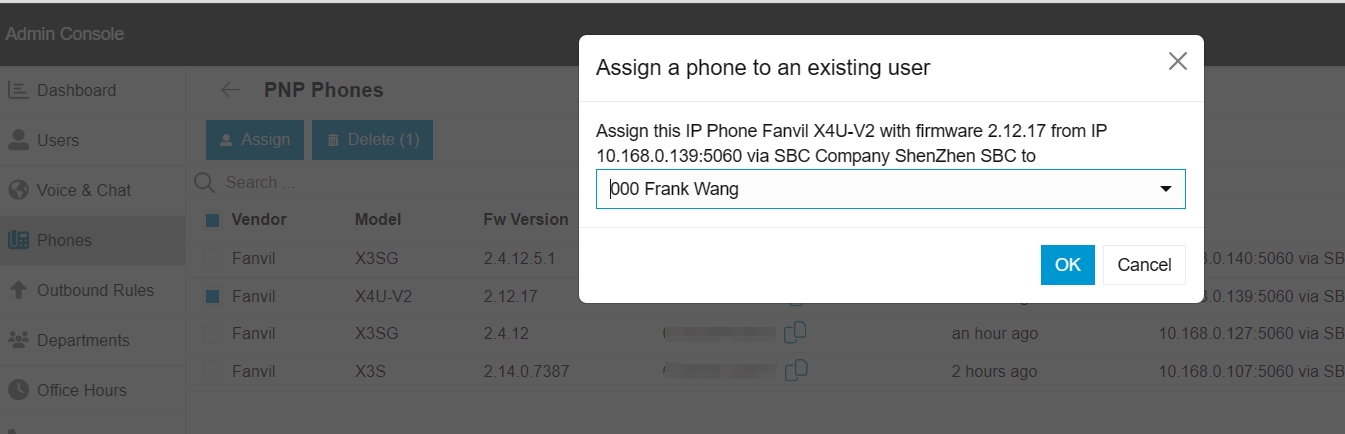
The second method is that if the phone and the server are in the same network or the network where the phone is located has deployed 3CX SBC, and the phone is connected to the network, then we can directly go to the phone page, click on the PNP phone option, and then on the PNP phone page Inside we can see our phones, and then we can select the phones to assign to users.